This step-by-step guide will teach you how to create low-poly, facet-style desktop wallpaper with Cinema 4D and Photoshop
Popularised by the great New York-based art director and illustrator Justin Maller,
the low poly facet-style render is easier that you think in Cinema 4D
and Photoshop. If you're new to the softwares, there are plenty of Cinema 4D tutorials and Photoshop tutorials
to get you started. But for those of you who are ready to go, here's a
simple 12-step guide to creating your very own low-poly facet
wallpaper.
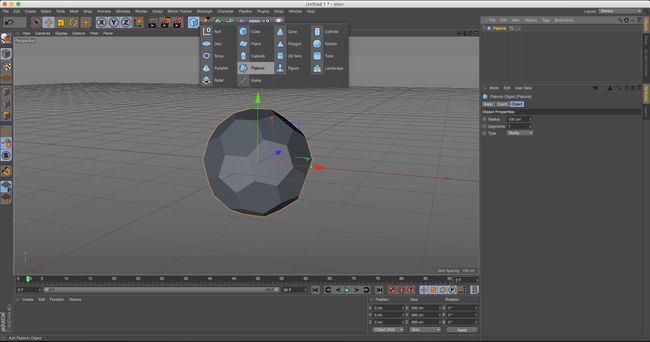
First
off, fire up Cinema 4D and add a platonic shape from the shape menu to
your scene. Select the shape in the objects menu and select the object
tab in the Attribute panel below. Change the type to Bucky.
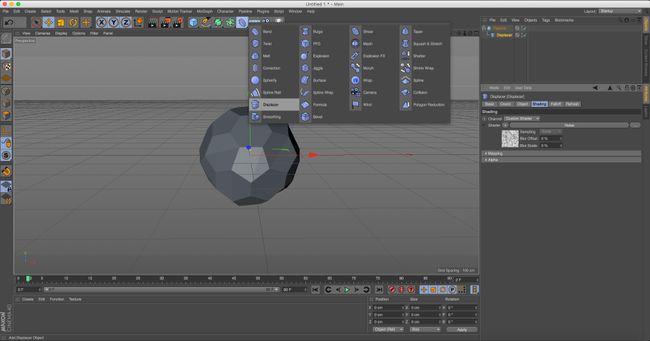
Next,
select a Displacer object. This lives in the same menu as the Bend
object. Move the Displacer inside your Platonic shape in the Objects
panel to make it a child of the shape.
Once
there, select the Shading tab from the Attributes panel below. Next to
the shader, click the little white arrow button to be able to select
noise. Once selected, click the object tab and alter the height. This
will start to create the kind of shapes we're looking for.
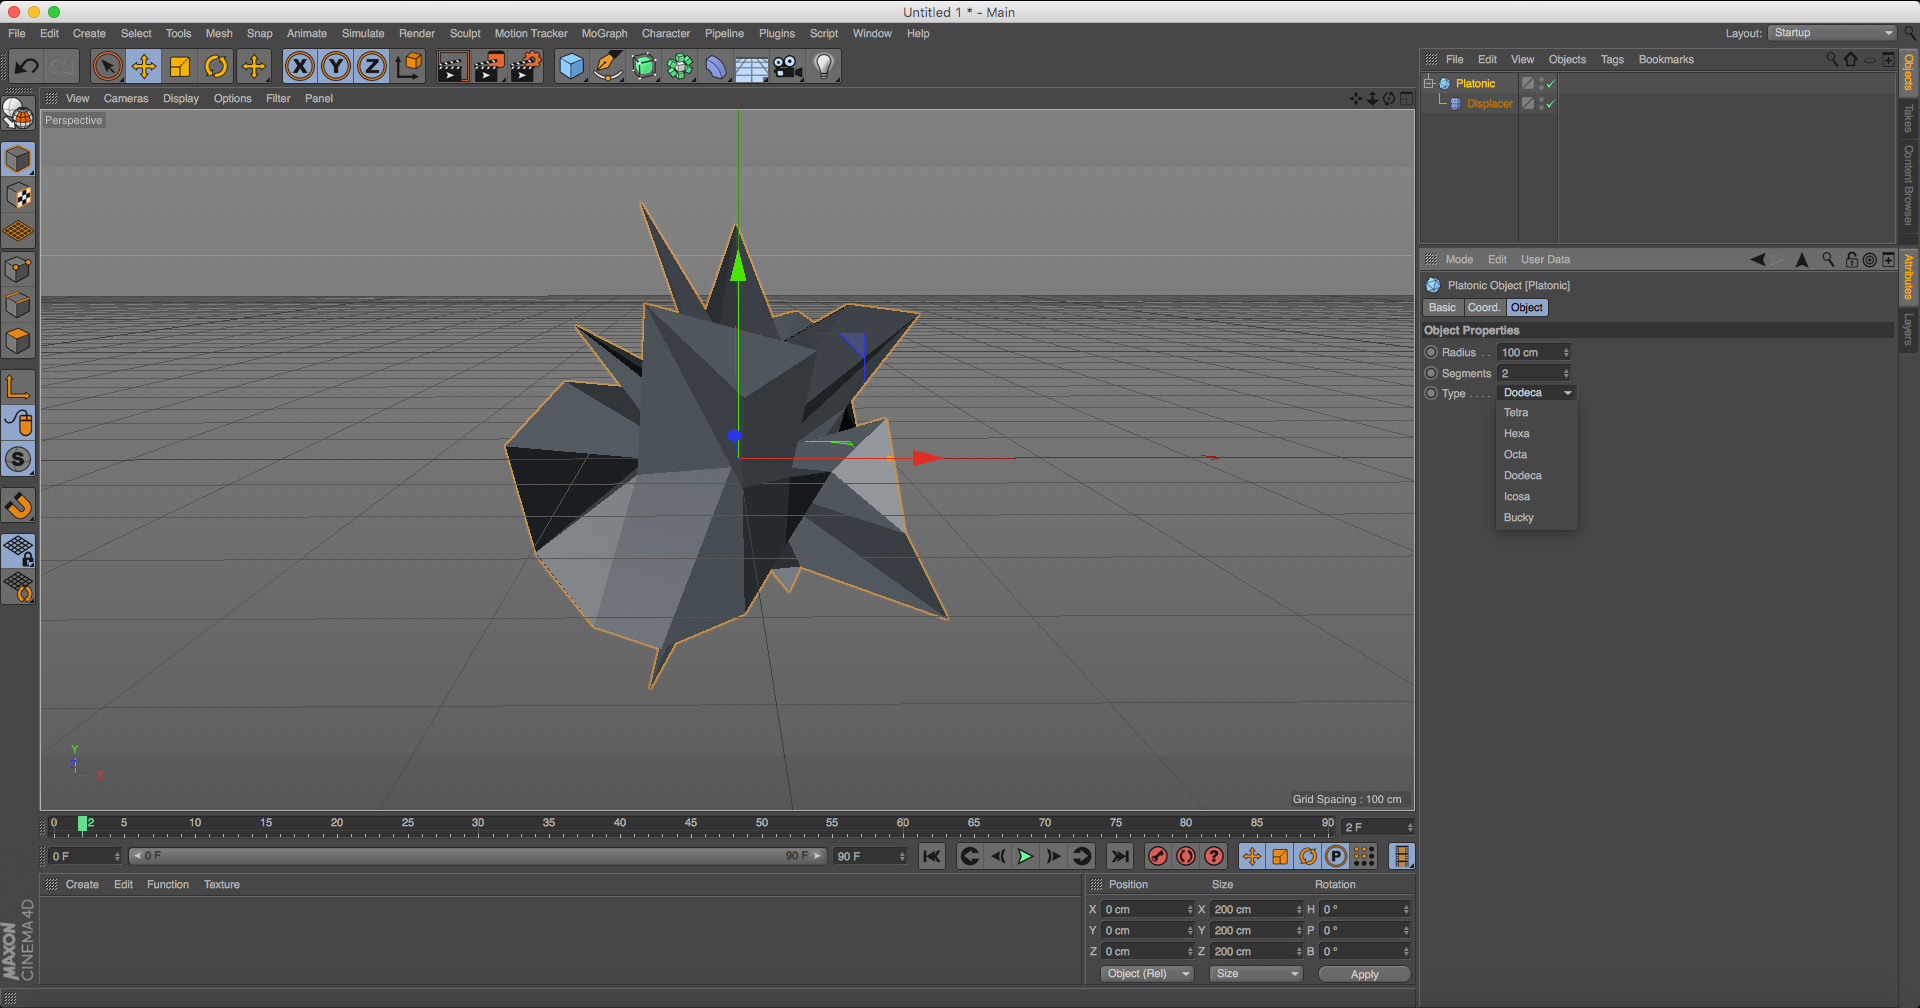
As
well as playing around with the height and noise attributes, you can
also tweak the attributes of the Platonic shape, like its type and
segments. This will give you a more detailed shape. It's worth playing
around until you get one you like.
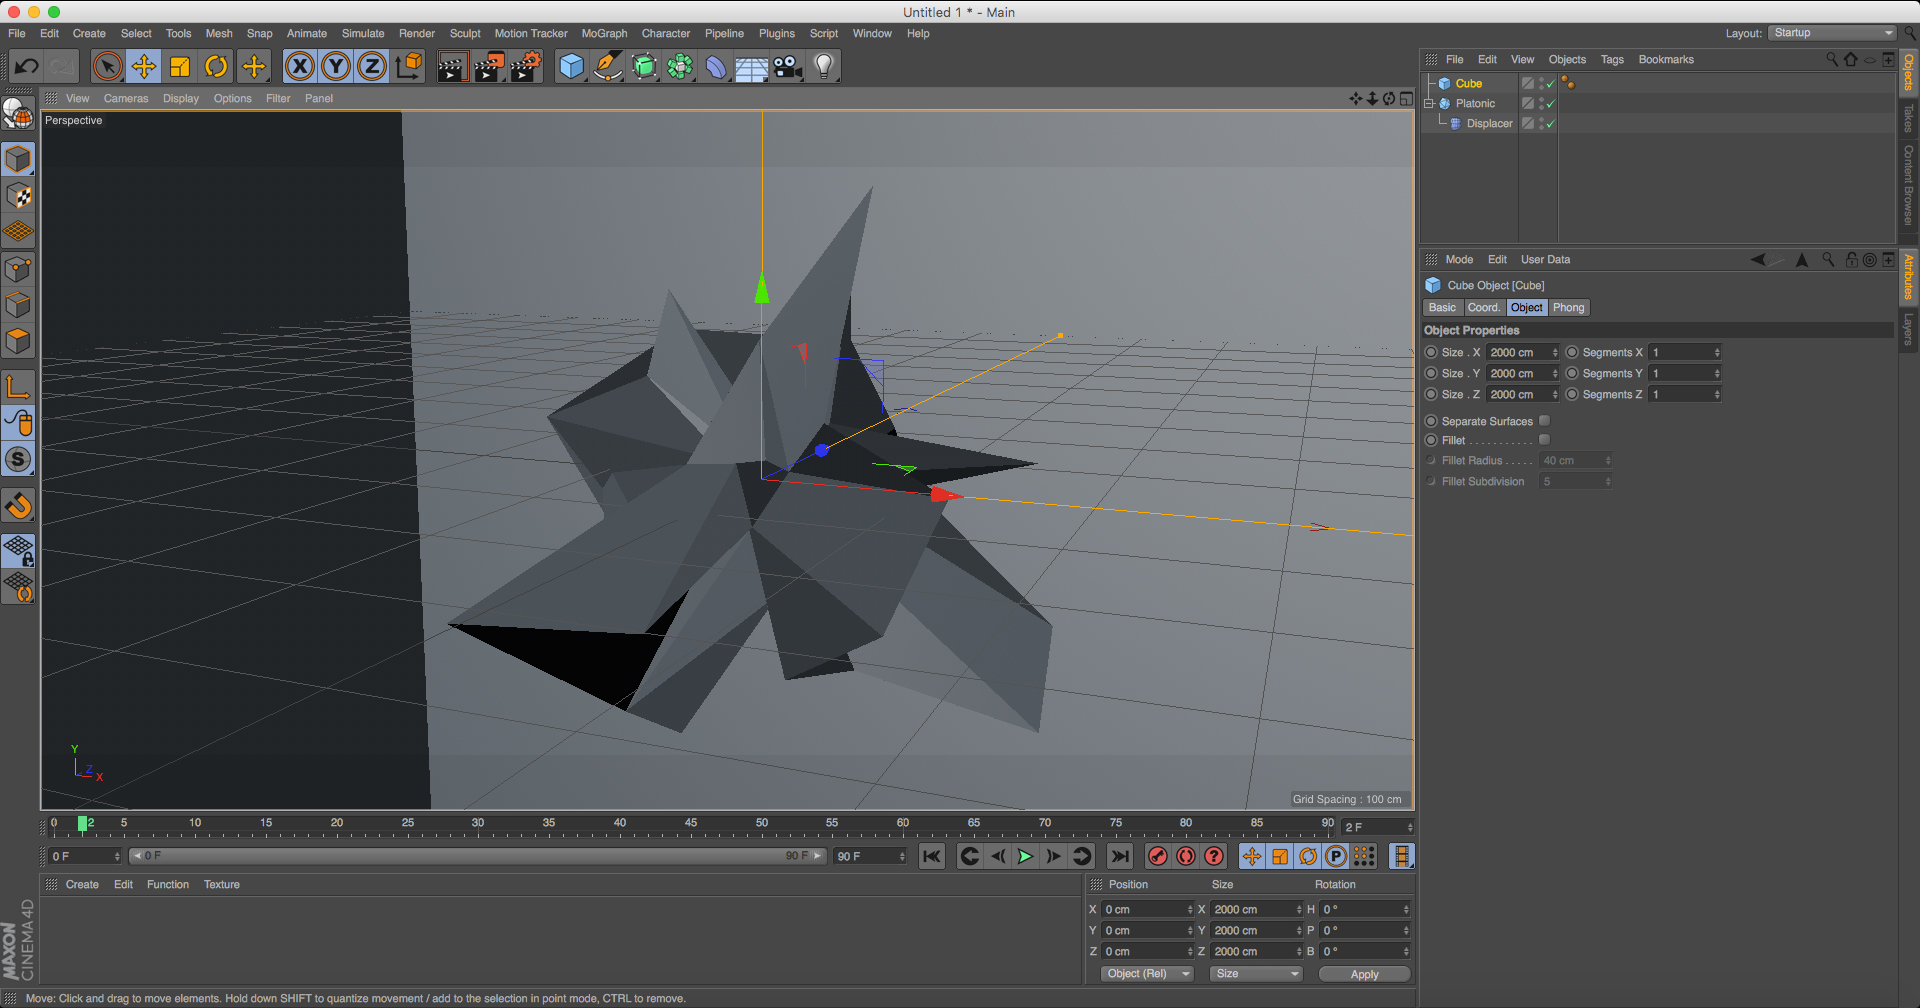
Next,
we'll need to add another shape to our scene. We'll use this later to
project colour into our Platonic shape. So select a cube and in its
Attributes/Object panel change its X/Y/Z size to 2000cm. This should
surround your Platonic shape and still allow you to see it.
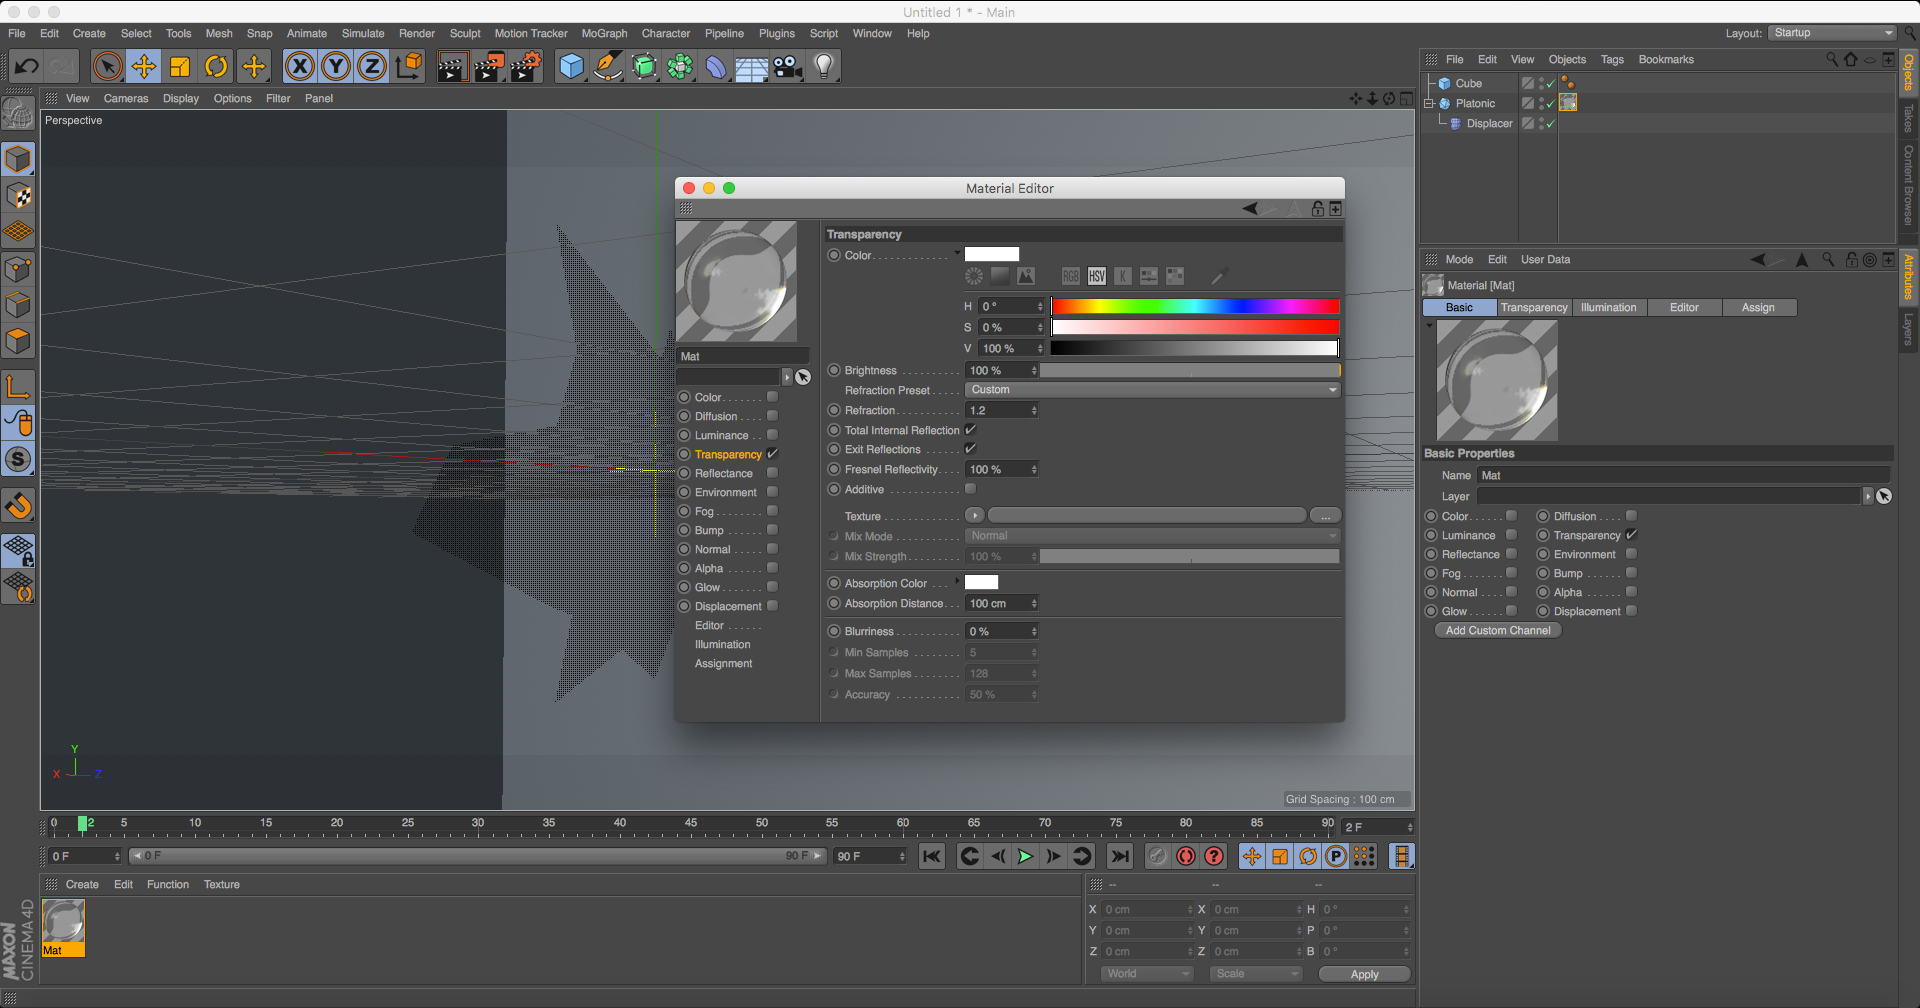
Let's create some materials to apply to our shapes. First, some glass. To do this select Create > New material from the materials panel, bottom left of your screen.
Once
it appears, double-click the material to bring up your Materials
window. On the left-side of the window turn all attribute types off,
other than Transparency. Once selected in the right-hand panel, change
the Refraction setting to 1.2. With the glass created, drag the material
and drop it onto your Platonic shape.
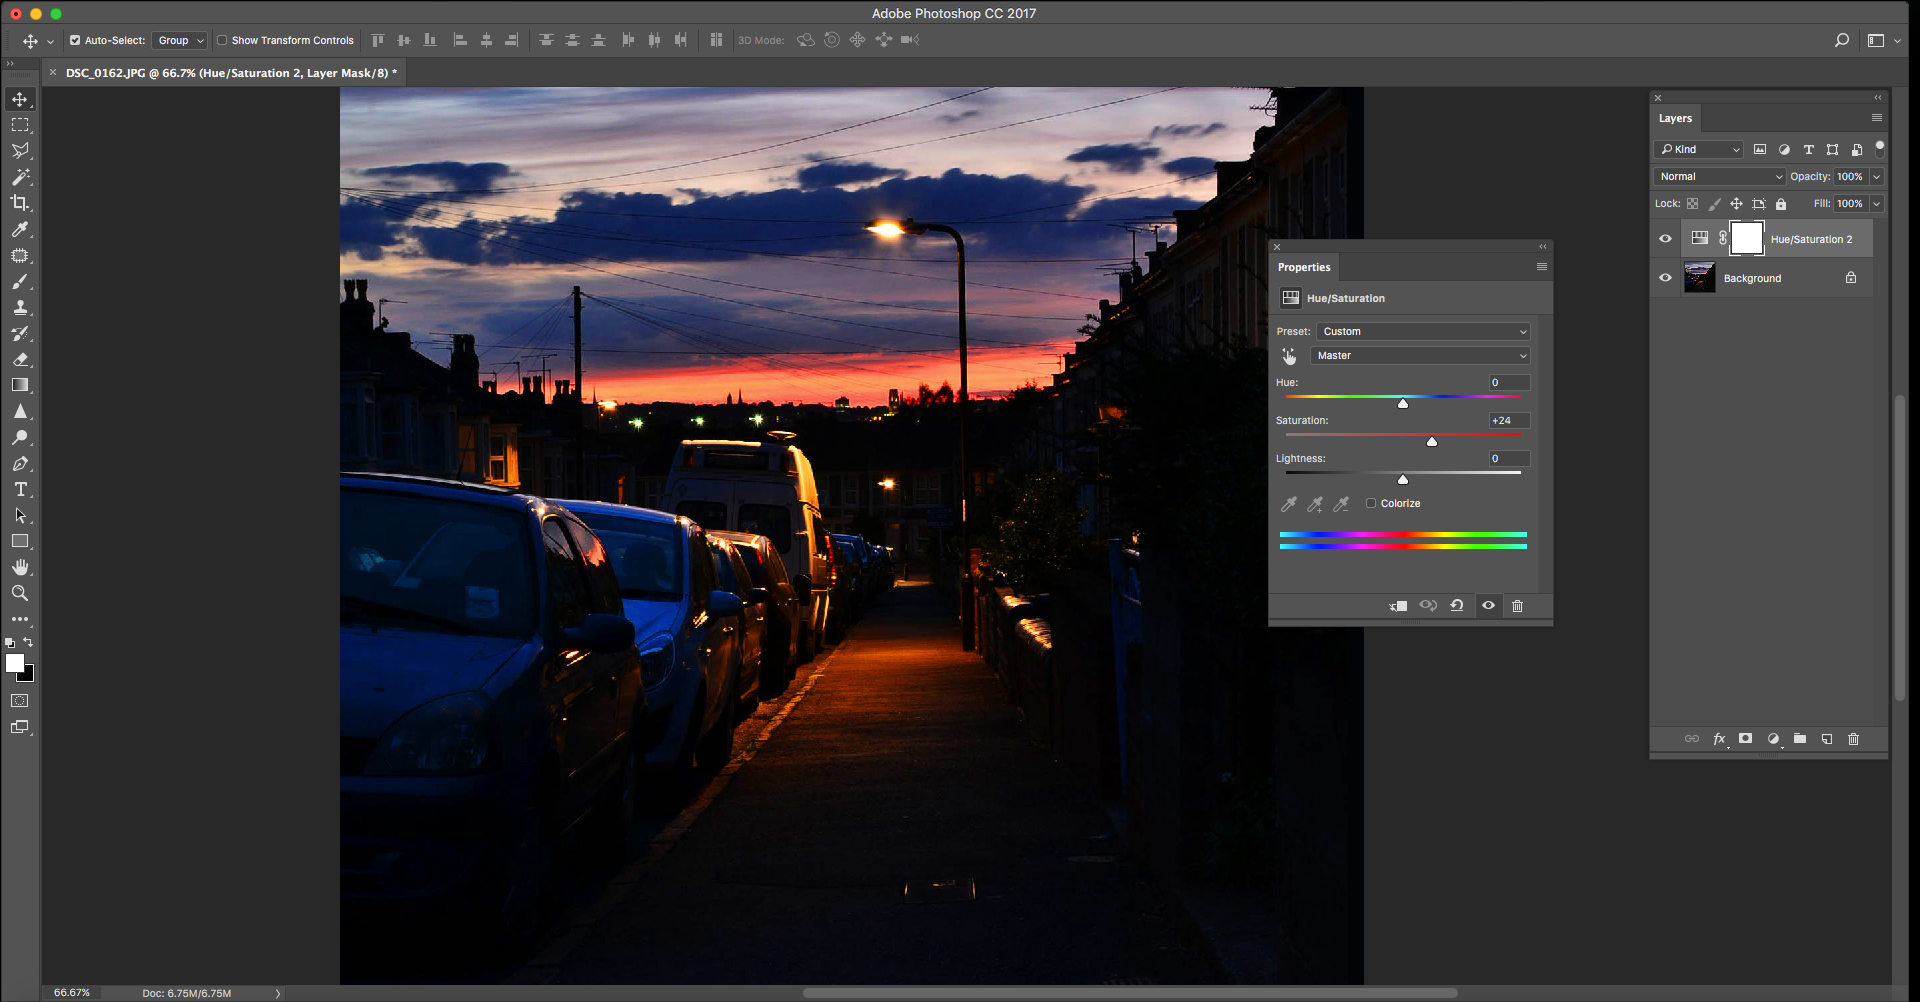
Next,
we'll need to find a photo or image that we'll use to project onto our
shape. I found that darker, high-contrast images seem to work well, as
well as dropping them into Photoshop first and boosting up the
Saturation.
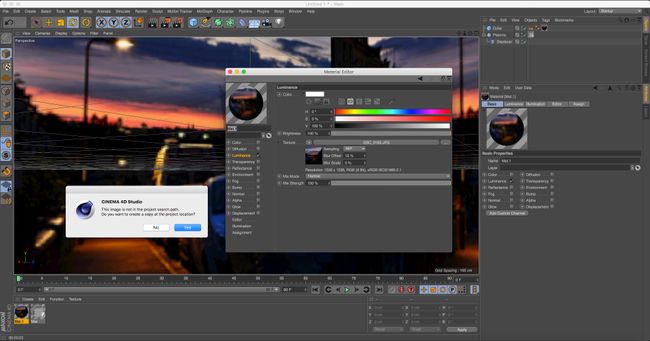
Back
in Cinema 4D, create a new material (as you did previously), but
instead of Transparency, only click the Luminance type. A this point, we
can apply our photo to the material. On the right, click the three-dot
button to the far right of the texture button. Find your image and click
OK.
Cinema 4D might prompt you that it's going to move the image
to the project location. Just click 'Yes' – this will allow C4D to find
it again later. Once applied to the material, alter the Blur offset to
around 15 per cent. Now drag the material onto your cube object.
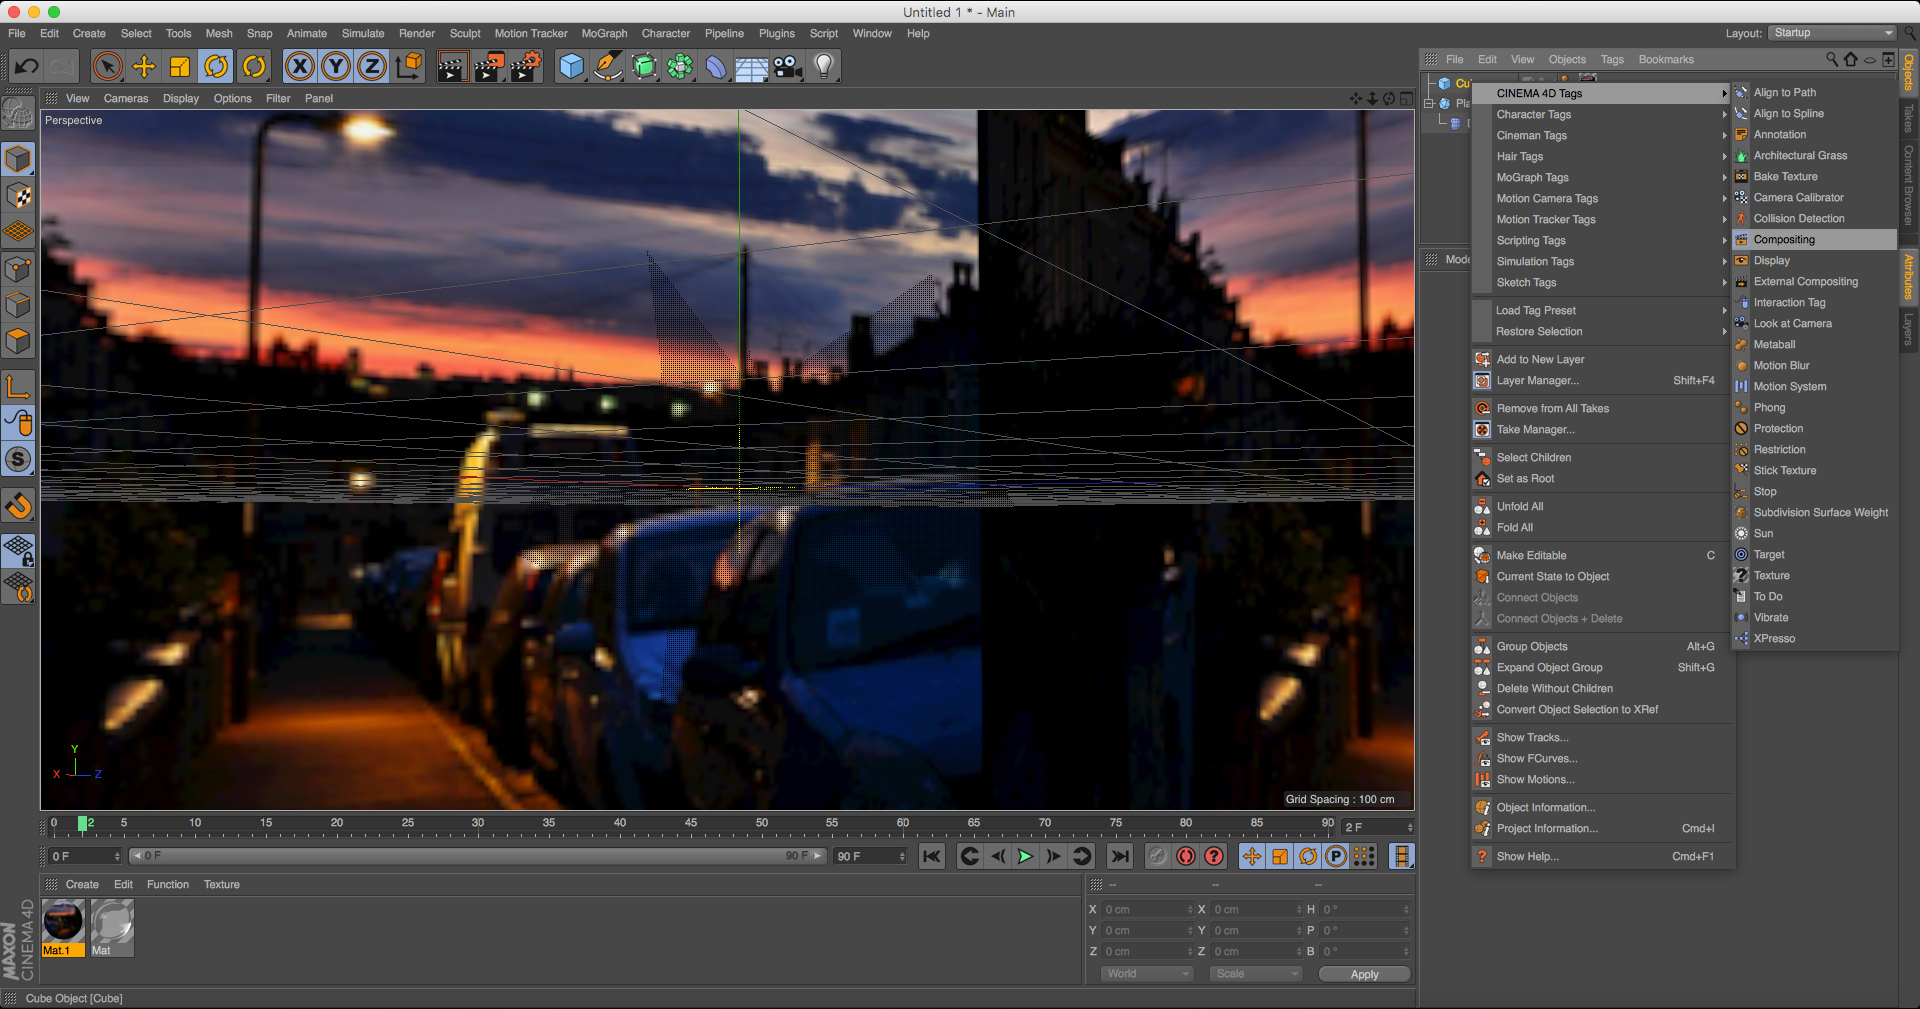
Now
what we need to do is allow the cube to affect the Platonic shape
without it appearing in the scene. This is simple. All you need to do is
right-click on the cube and select Cinema 4D tags/Compositing. Once it
appears in your Object menu, select it and click the Tag tab in the
Attribute menu below.
There
should be a checkbox called 'Seen by camera'. Untick this. It might not
seem like the cube has disappeared, but when you render, it won't be
there.
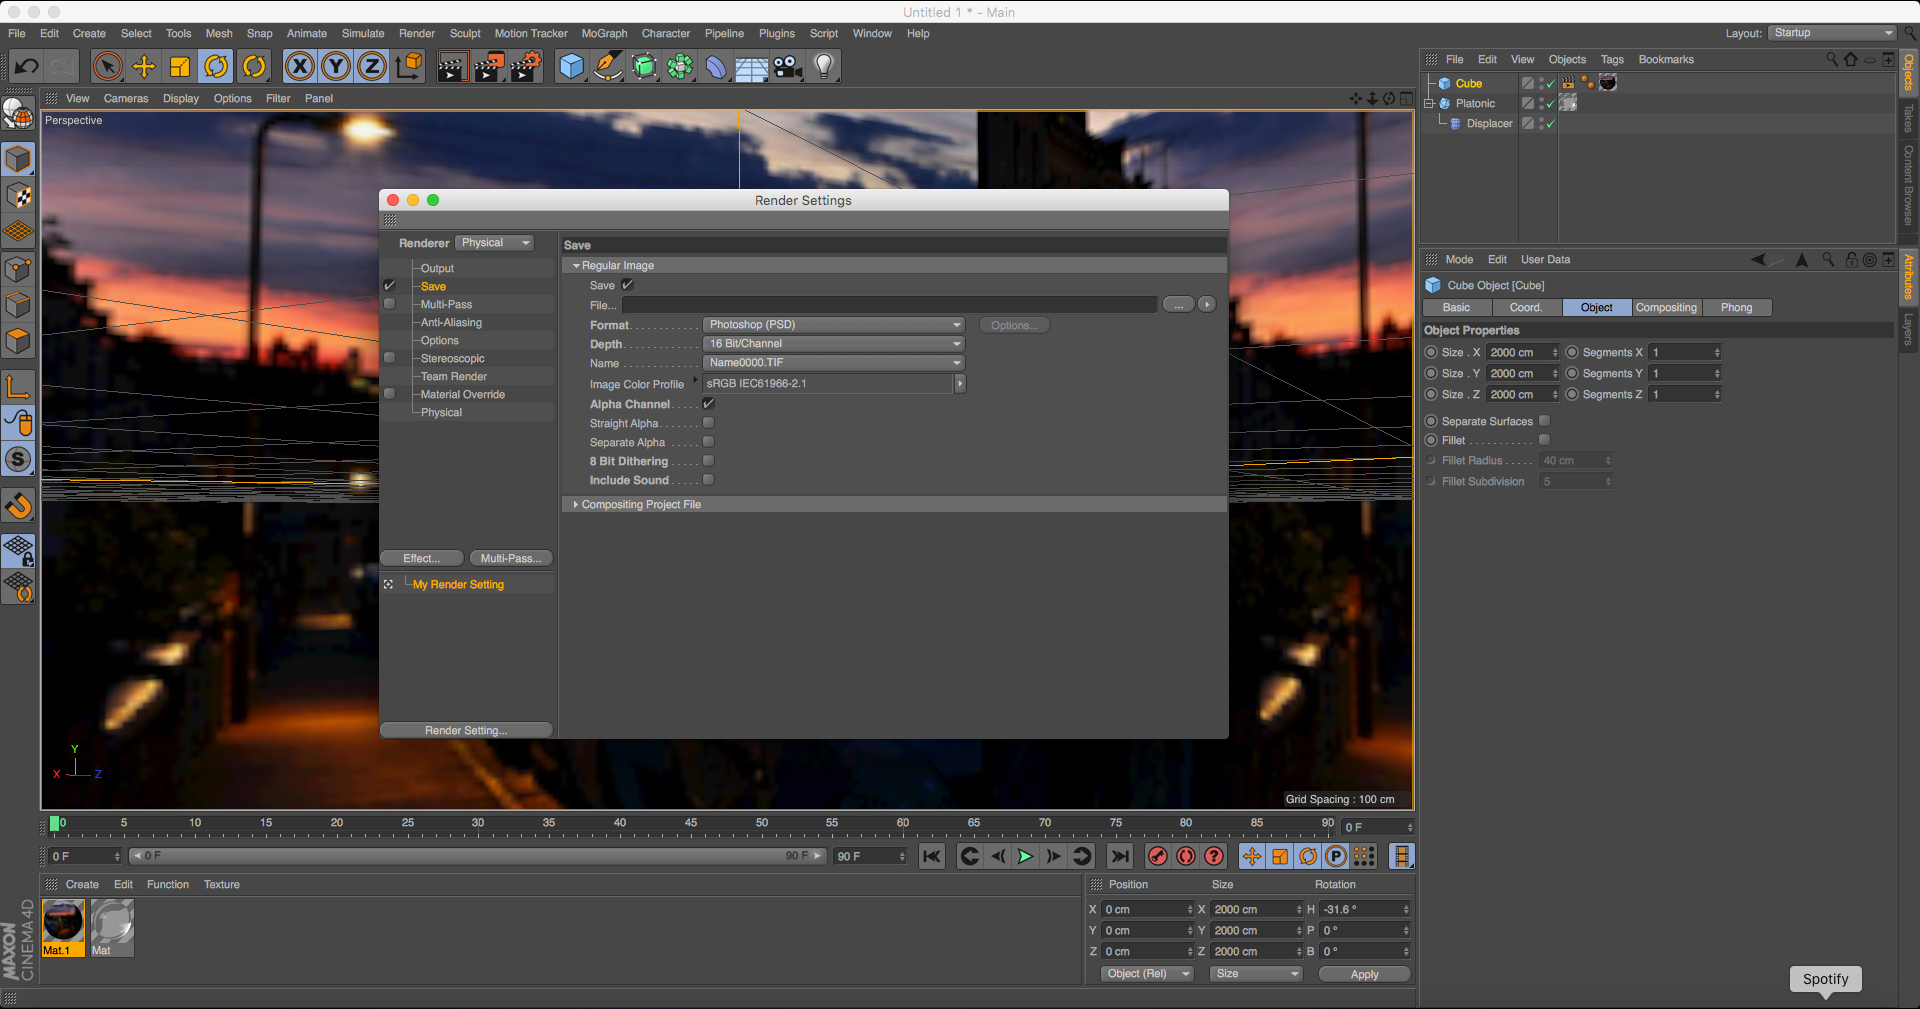
Now
for the final render. Click the render setting button (a clapper board
with a clog) to bring up your render settings window. For the render
button select Physical. In your Output menu alter your width and height
to 1960px by 840px, this should high enough resolution for most
desktops. In the Save menu select Format PSD, Depth 16 bit, and click on
the alpha channel box (we'll use this later in Photoshop).
Once
you've altered your resolution you might have to go back to your scene
and move your camera to position your shape how you want it. You can do
this by using 1,2,3 quick key to move rotate and zoom your camera. Then press shift+R to render your final image.
Once
the Picture Viewer has finished rendering, select File/Save as then
open your file in Photoshop. Now for the finishing touches.
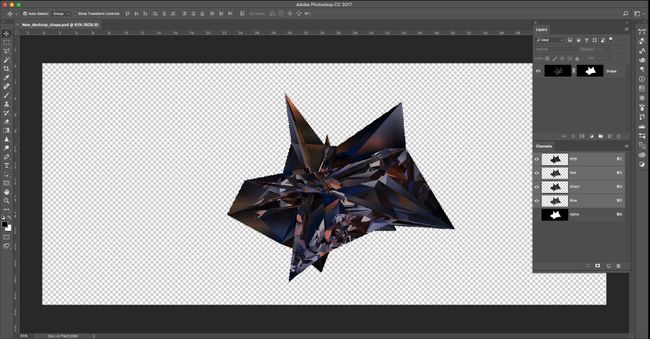
In Photoshop open the Channels panel and cmd+click
the extra channel supplied by C4D. With this selection, create a layer
mask in your Layers panel, making your shape sit on a transparent layer.
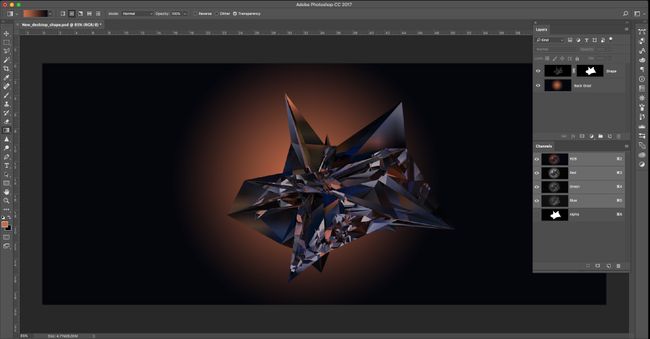
Next,
create a new layer and set this below your masked shape. With the
Droplet tool, select a highlight colour for rendering for your
foreground, and one of the darkest colours for your background. With
these selected use the Gradient tool set to Radial, and draw on a
background.
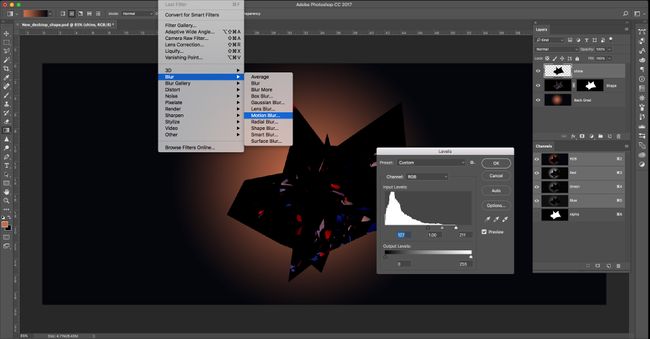
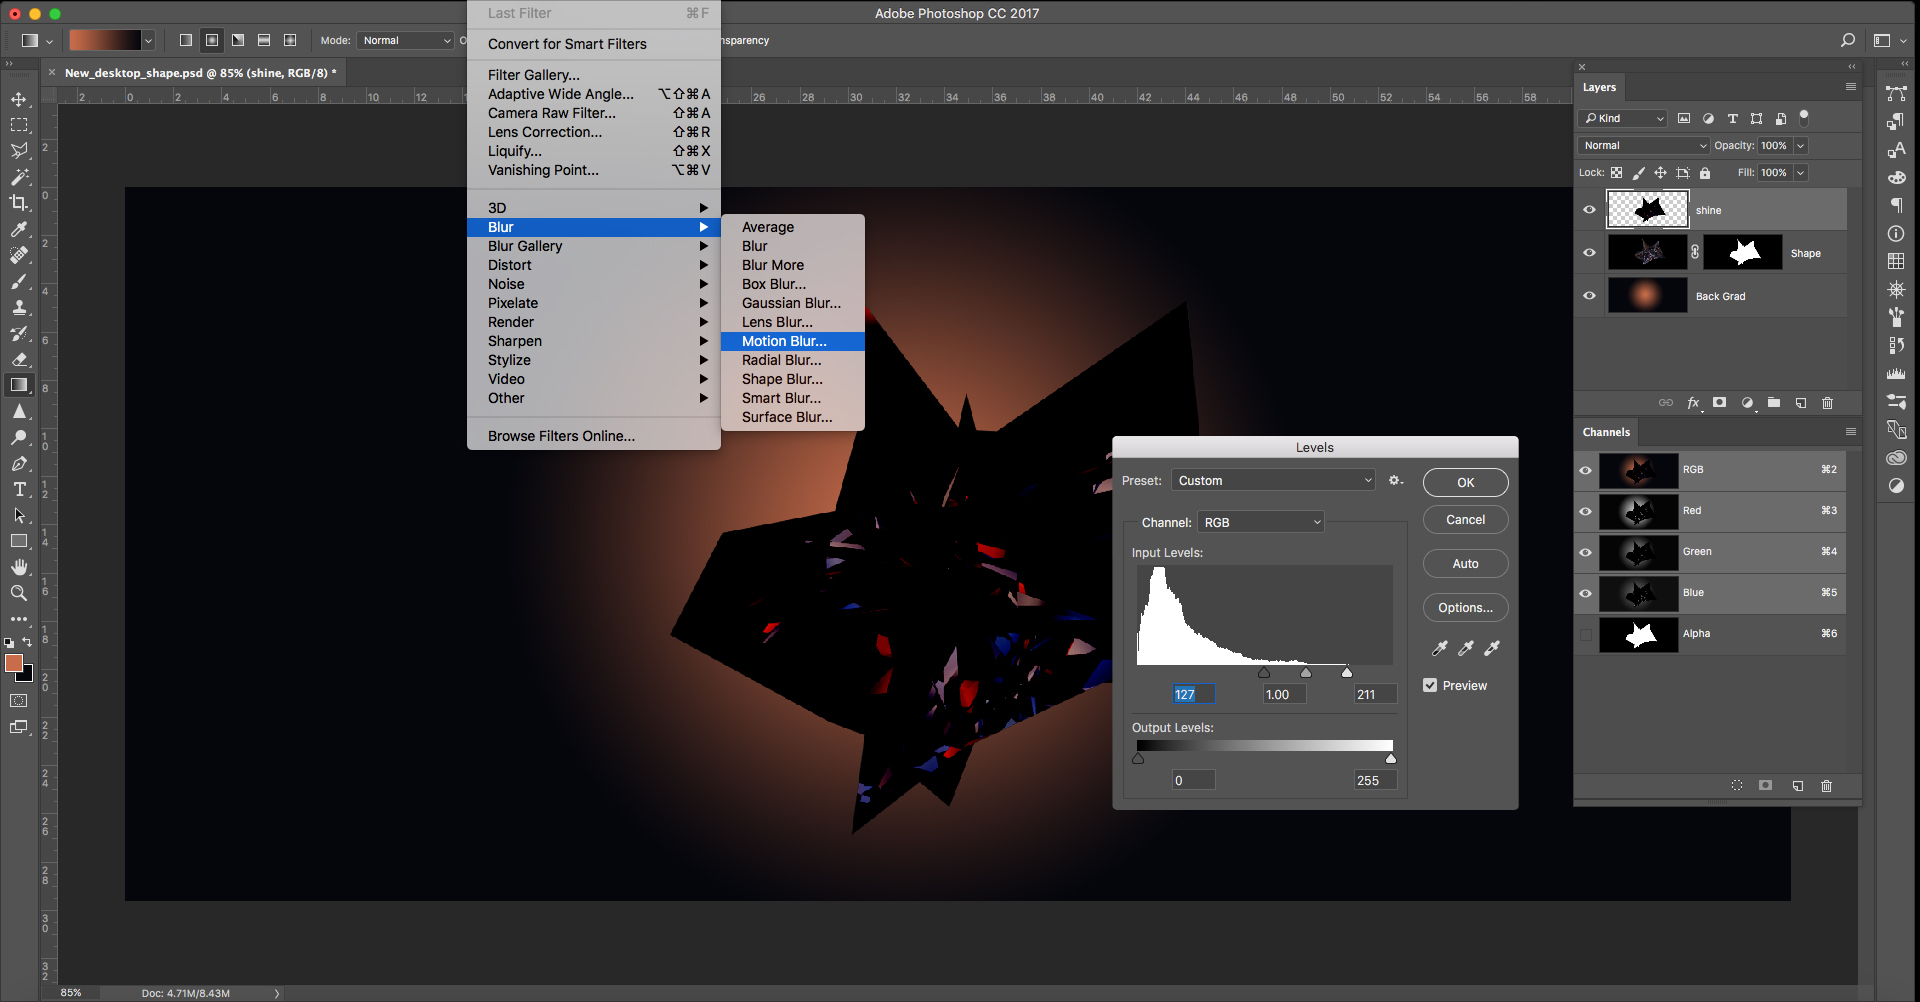
To
add some extra shine, duplicate your shape and right-click the layer.
Apply the mask, taking the background away. Once separated, bring up
your Levels panel (cmd+L). Using the three triangles below the histogram, clip the highlights by moving them to the right.
With
this layer modified, select Filter/Blur/Motion Blur and apply an angle
and distance depending on your shape. Next simply apply Screen Mode to
this layer to give you some more contrast and shine.
One final quick tip: If your shape seems to be a bit floaty, try adding a shadow.


